Getting Started
This guide will walk you through creating and deploying your first Jello web application.
Prerequisite setup
Jello is a java framework for developing web applications on Google App Engine (GAE). As a prerequisite, you will need to:
- Verify Java 8 is properly installed. (How can I find which version of Java is installed)
- Install Eclipse IDE for Java Developers. Version 4.7 or higher.
- Install the Google Cloud Tools for Eclipse plugin.
Creating a new Google App Engine standard project
To create a new Google App Engine standard project :
-
Click the Google Cloud Platform toolbar button
 .
. -
Select Create New Project > Google App Engine Standard Java Project.
-
Enter a Project name and (optionally) a Java package.
-
Check Create as Maven Project and enter a Maven Group ID and Artifact ID.
-
Select the libraries App Engine API, and Objectify.
-
Click Finish.
Test the app locally with the Development Server
You can run and test your app in an emulator running on your local computer.
Right click on your project root folder » Run As » App Engine.
- Check the console and look for the dev server URL.
More info can be found at: Running and Debugging an App Engine Standard Project locally Inside Eclipse
Adding Jello Support to your project
Download Jello SDK
To install Jello SDK:
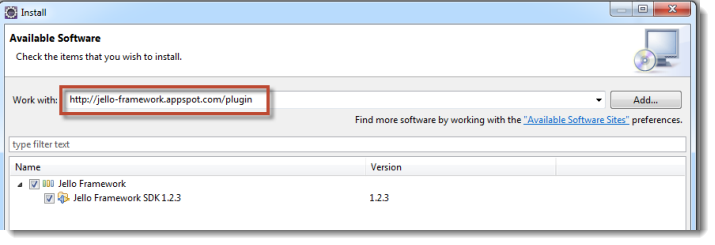
Click on Help » Install New Software....
In the Work with text box enter the following update site URL: http://jello-framework.com/plugin.
- Select Jello Framework SDK, click Next and OK as needed until the IDE is restarted and the plugin is installed.
Adding Jello support to an existing App Engine project
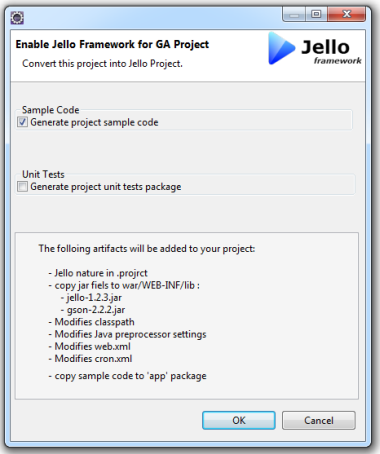
- Right click on the project root folder Jello Framework » Convert to Jello project....
- Check the Generate sample code option and click OK.
- Take a minute to explore the project structure. A new app folder has been created, containing the sample jello application app namespace.
In addition, a few files were added or modified under the war/WEB-INF folder.
Take Jello for a spin - run the sample app
- To run the project as a Web application -
click on the
Run toolbar button and select
You can also run it by right clicking on your project root folder » Run As » Web Application
- Open a web browser and type http://localhost:8888/jello.
Click on the Product Data view link.
- Open a web browser and type http://localhost:8888/jello.
Click on the Product Data view link.
- click on the Actions button, select and run createCatalog action.
- Check action results and click the Back button.
- Click the New button to create new product or click on one of the Key fields to edit an existing product record.
- click on the
Entities button and navigate to the Category entity.
Upload to Google cloud Platform
Sign in for Free Google Cloud Platform account
Go to cloud.google.com and sign in to create a free account. Yes, they will ask for your credit card (to make sure you are not a robot) but don't worry, you won’t be charged unless you manually upgrade to a paid account.
After signing in, you will be redirected to the Cloud Console. Select App Engine.
- From the Developers Console, open the
Projects dropdown located on the upper left corner of the page. Click New Project.
- Select a name for your project and pick a unique Project ID by clicking on the
link.
To deploy the application, select the project root in Eclipse and click on the Google Cloud Platform toolbar. Select Deploy to App Engine Standard....
Select the project ID you just created on Google Cloud Platform and click Deploy.
- If everything went well and the application has been deployed successfully, you should be able to check your new app in the following public URL:
http://<Application-ID>.appspot.com/jello
(replace <Application-ID> with the actual project ID).
Congratulations! You have just deployed your first Jello application on Google cloud!
Was this page helpful? Let us know how we did:
Last updated March 22, 2019.


